How to Connect TIBCO Spotfire® Desktop to TIBCO ComputeDB
TIBCO Spotfire® Desktop allows users to easily author and update ad-hoc analytics, applications, and dashboards. To connect TIBCO Spotfire® Desktop to TIBCO ComputeDB, setup and launch the TIBCO ComputeDB cluster.
Note
The Spark SQL connector based on the Simba ODBC driver in Spotfire has some performance issues. We noticed an overhead of about 5 seconds over the query time in TIBCO ComputeDB. You can see the query timings in the ComputeDB dashboard. We expect this issue to be resolved before full GA of this feature.
Experimental (but Faster) Spotfire Connector (based on TIBCO ComputeDB Native ODBC)
An experimental but much faster connnector is also available from TIBCO engg and accessible from here.
Download and Launch TIBCO ComputeDB
Check the system requirements, download and install TIBCO ComputeDB, and then start the TIBCO ComputeDB cluster. Hive Thrift server is enabled by default. If you want to securely access the Hive Thrift server using SSL encryption, you must set these additional properties in the Lead Node Configuration:
-hive.server2.use.SSL=true-hive.server2.keystore.path=<keystore-file-path>-hive.server2.keystore.password=<keystore file password>
Connecting Spotfire® Desktop to TIBCO ComputeDB
Login and download TIBCO Spotfire® Desktop from the TIBCO eDelivery website. Follow the setup guidelines to install the product. After installation, you can use the following steps to connect Spotfire® Desktop to TIBCO ComputeDB.
- On the Spotfire® Desktop application, from the left panel, click Connect to > Apache Spark SQL > New Connection.
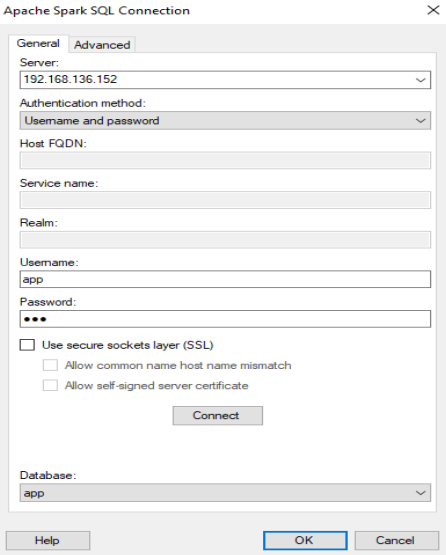
The Apache Spark SQL Connection dialog box is displayed.
-
In the General tab, enter the following details:
-
Server: Enter the hostname/IP of the Lead node in TIBCO ComputeDB cluster
Note
The Hive2 Thrift server uses port 10000 by default. If you have explicitly configured the port number, then you must specify the port number as:
<IP or Hostname>:<port number> -
Authentication Method: Select username and password option.
- Username/Password: Provide a username and password. You could choose to use APP/APP for username/password if authentication was not configured in the cluster.
-
-
Select the Use secure sockets layer check box if you want to access the Hive Thrift server securely. Else, you can clear the check box.
Note
Ensure to configure the lead node with additional properties for securely accessing the Hive Thrift server with SSL encryption. See Setting TIBCO ComputeDB.
-
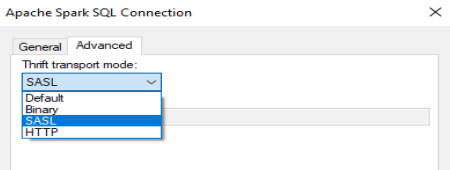
Click the Advanced tab and set the Thrift transport mode to SASL.
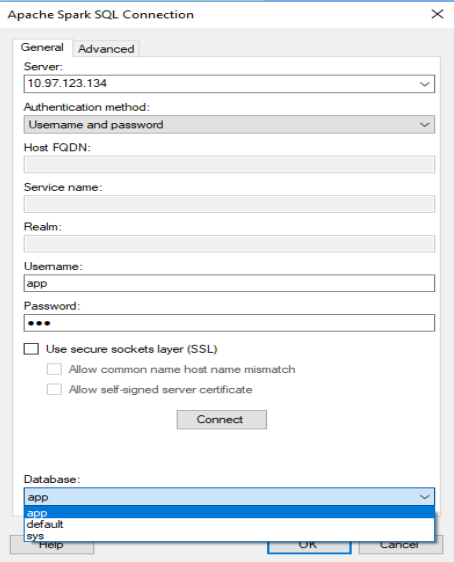
- Go to General tab and then click the Connect button.
- From the Database dropdown, either choose the existing database (schema) app or default or you can choose a database (schema) that is created in the TIBCO ComputeDB cluster.
- Click OK. The View In Connection (VIC) box is displayed which lists the tables from the selected database.